Author name: weathertekfl

Commercial building with glass facade and surrounding landscape showing effective surface drainage design

8 Most Common Commercial Drainage Problems Businesses Face

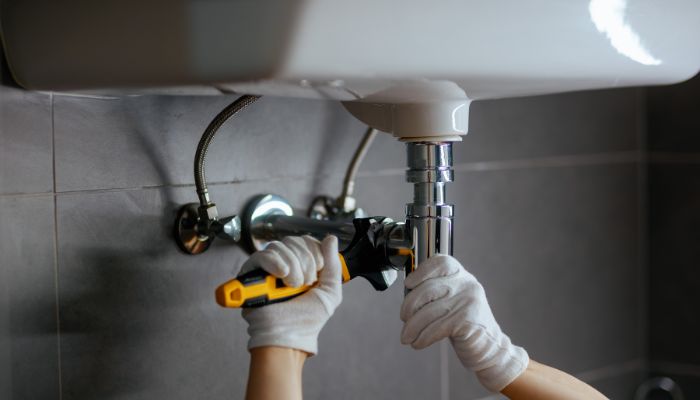
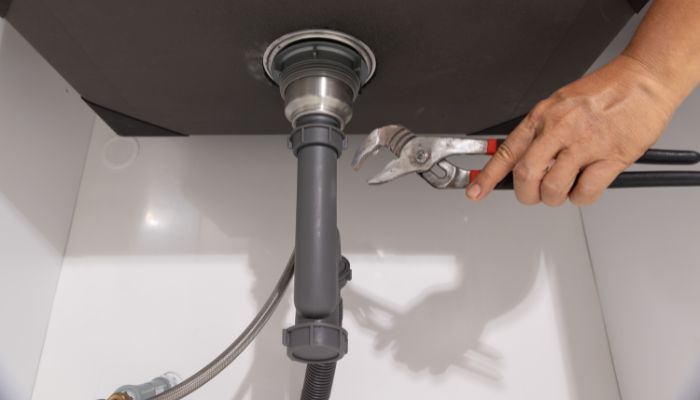
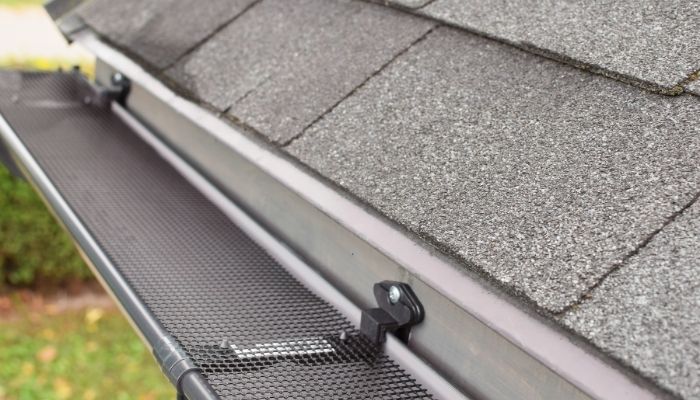
Commercial drainage problems can quickly disrupt operations, damage property, and create safety risks for businesses. The most common issues include clogged drains, poor grading, standing water, sewer backups, and damaged pipes—each requiring timely professional attention. If you manage a retail store, warehouse, office complex, restaurant, or industrial facility, understanding these drainage challenges helps you prevent downtime and costly repairs. Below are the 8 most common commercial drainage problems businesses face, explained with practical insights and expert-backed solutions. 1. Clogged Commercial Drains Clogged drains are the most frequent commercial drainage issue, often caused by grease, debris, sediment, and improper waste disposal in high-traffic facilities. In commercial settings, drains handle significantly more waste than residential systems. Restaurants deal with grease and food waste, warehouses collect sediment and debris, and office buildings accumulate paper and soap buildup. Over time, these materials restrict water flow, leading to slow drainage, foul odors, and even overflow. Routine inspections and scheduled commercial drain cleaning services are essential to keep systems operating efficiently and avoid emergency shutdowns. Professional cleaning using hydro jetting and mechanical snaking ensures complete removal of buildup without damaging pipes. 2. Standing Water Around the Property Standing water around commercial buildings signals poor surface drainage, clogged catch basins, or improper grading that prevents water from flowing away from the structure. After heavy rain, puddles in parking lots, loading docks, or landscaped areas indicate drainage failure. This not only creates slip hazards but also weakens pavement and foundations. If left unresolved, standing water can seep into the building envelope, increasing the risk of mold growth and structural deterioration. Proper grading, trench drains, and stormwater management systems help redirect water safely away from the property. 3. Sewer Line Backups Sewer backups occur when blockages or damaged pipes prevent wastewater from flowing into municipal systems, forcing sewage back into the building. This is one of the most serious drainage problems a business can face. Backups cause contamination, unpleasant odors, and potential health code violations. Common causes include tree root intrusion, grease buildup, pipe collapse, or excessive rainfall overwhelming the system. Early warning signs include gurgling drains, multiple slow fixtures, and sewage smells. Routine camera inspections can identify internal pipe damage before a full backup occurs. 4. Poor Stormwater Management Inadequate stormwater drainage systems can overwhelm commercial properties during heavy rainfall, leading to flooding and landscape erosion. Florida businesses, especially in coastal regions, face intense rainfall events. Without proper retention ponds, French drains, or channel drains, stormwater accumulates rapidly. Effective drainage planning requires understanding soil conditions, water flow patterns, and local building codes. If you want to explore preventative strategies, review these proven commercial drainage solutions to prevent costly water damage that protect businesses long term. Proactive design prevents expensive restoration and operational downtime. 5. Damaged or Collapsed Drain Pipes Aging or damaged pipes can crack, corrode, or collapse, disrupting drainage flow and causing hidden underground leaks. Many commercial properties operate with decades-old piping systems. Over time, shifting soil, heavy vehicle loads, and corrosion weaken underground lines. Signs of pipe damage include unexplained sinkholes, persistent wet spots, or sudden drainage slowdowns. Advanced diagnostic tools such as video pipe inspections help pinpoint exact failure points without unnecessary excavation. Timely pipe repair or replacement minimizes disruption to daily operations. 6. Grease Trap Failures in Restaurants Grease trap overflow or failure leads to clogged pipes, foul odors, and potential regulatory violations for food service businesses. Commercial kitchens generate high volumes of fats, oils, and grease (FOG). Without regular maintenance, grease traps become overloaded, allowing buildup to enter sewer lines. This can result in severe blockages and costly health inspections. Scheduled pumping and cleaning are critical for compliance and smooth kitchen operations. Partnering with experienced drainage specialists ensures grease systems meet local environmental standards. 7. Foundation Drainage Issues Improper drainage near foundations allows water to accumulate against building walls, increasing the risk of structural damage and interior leaks. Water pooling near a commercial foundation can seep through cracks, weaken concrete, and compromise structural integrity. In multi-unit or large commercial buildings, this issue can affect multiple tenants simultaneously. Installing proper perimeter drains, sump pumps, and grading adjustments helps safeguard the property’s foundation. Preventative drainage planning is far more cost-effective than structural repairs. 8. Blocked Catch Basins and Storm Drains Blocked catch basins and storm drains restrict surface water flow, increasing flood risks in parking lots and commercial landscapes. Leaves, trash, sediment, and construction debris frequently clog stormwater entry points. When these drains fail, water accumulates quickly during heavy rainfall. Routine cleaning and maintenance of catch basins prevent surface flooding and pavement damage. Businesses that implement scheduled maintenance programs experience fewer emergency repairs and lower long-term costs. Why Proactive Commercial Drainage Maintenance Matters Commercial drainage systems are more complex and higher capacity than residential ones. They support business continuity, safety compliance, and property value protection. From experience working with commercial properties, drainage failures often start small—slow drains, minor pooling, occasional odors—but escalate rapidly when ignored. Preventative maintenance programs, regular inspections, and expert diagnostics reduce unexpected shutdowns. Professional drainage contractors use advanced tools like hydro jetting, CCTV camera inspections, trench drain installations, and engineered stormwater systems to address root causes—not just surface symptoms. When evaluating service providers, look for: Licensed and insured drainage specialists Proven experience with commercial properties Knowledge of Florida building codes and stormwater regulations Transparent maintenance plans and emergency support Protect Your Business with Expert Commercial Drainage Solutions Drainage problems don’t just create inconvenience—they threaten operations, customer safety, and long-term structural integrity. Addressing issues early protects your investment and ensures uninterrupted business performance. If your business in Jacksonville is facing clogged drains, stormwater pooling, or sewer concerns, WeatherTek delivers reliable, professional commercial drainage services tailored to your property’s unique needs. Contact WeatherTek today to schedule an inspection and protect your commercial property with the best commercial drainage services across Jacksonville, Florida.

Surface water flowing into channel drain for proper backyard drainage

Top Backyard Drainage Solutions for a Dry, Healthy Yard

Backyard drainage solutions are systems designed to remove excess water from your yard to prevent standing water, soil erosion, lawn damage, and foundation problems. The most effective options include French drains, dry wells, channel drains, swales, permeable pavers, and sump pumps — each chosen based on your yard’s slope, soil type, and severity of water buildup. Installing the right backyard drainage system protects your home, keeps your lawn healthy, and ensures proper water flow year-round. Why Backyard Drainage Is So Important Ignoring water buildup can lead to: Lawn damage and dead grass patches Soil erosion and landscape destruction Mold growth and mosquito breeding Cracks in your home’s foundation Basement or crawl space flooding Installing the right drainage system for your yard ensures water flows away from your property — not into it. 1. French Drains – The Most Popular Backyard Drainage System A French drain is one of the most reliable lawn drainage solutions available. It uses a perforated pipe buried in a gravel trench to collect and redirect water away from problem areas. Why Homeowners Choose French Drains: Eliminates standing water Protects foundations Reduces soil erosion Works for small and large yards If water collects in low spots, a French drain is often the most effective long-term backyard drainage solution. 2. Dry Wells – Smart Underground Water Storage A dry well collects excess water and slowly releases it into the surrounding soil. This system works well when water cannot be redirected to a street or storm drain. Key Benefits: Prevents surface flooding Reduces soil oversaturation Promotes natural groundwater recharge Hidden underground for a clean look Dry wells are excellent yard drainage solutions for eco-conscious homeowners. 3. Channel Drains – Perfect for Patios & Driveways Also called trench drains, channel drains capture surface water and move it through underground pipes. They’re commonly installed near patios, pool decks, and driveways. Why Install Channel Drains? Fast removal of surface water Prevents slippery walkways Protects paved surfaces from damage Ideal for high-traffic areas If hardscaped areas are flooding, this drainage system for yard spaces can prevent costly repairs. 4. Rain Gardens – A Natural Drainage Solution Want a beautiful and eco-friendly option? Rain gardens combine landscaping with functionality. Special plants and soil layers absorb and filter rainwater naturally. Benefits of Rain Gardens: Enhances curb appeal Reduces runoff Supports pollinators Controls soil erosion This type of backyard drainage solution blends seamlessly with your landscape design. 5. Swales – Simple Yet Effective Water Control Swales are shallow, sloped channels that guide water away from your home while allowing it to soak into the ground gradually. Why Swales Work: Slows down water flow Minimizes erosion Budget-friendly option Natural-looking design They’re especially effective for larger yards with gentle slopes. 6. Permeable Pavers – Drainage Built Into Your Design Permeable pavers allow rainwater to pass through the surface instead of running off like traditional concrete. Advantages: Reduces water pooling Improves soil absorption Durable and low maintenance Stylish and modern look Replacing traditional paving with permeable materials improves both function and appearance. 7. Sump Pumps – For Severe Drainage Issues If your yard has serious water problems or basement flooding, a sump pump may be necessary. It automatically removes collected water and pumps it away from your home. Why Consider a Sump Pump? Prevents basement flooding Protects your foundation Activates automatically Ideal for flood-prone properties While it requires electricity, it provides strong protection during heavy storms. How to Choose the Right Backyard Drainage Solutions The best solution depends on: Yard slope and soil type Severity of water accumulation Property layout Budget Local rainfall patterns In many cases, combining multiple lawn drainage solutions provides the best results. Final Thoughts Water problems don’t fix themselves — and waiting often makes them worse. Investing in the right backyard drainage solutions protects your lawn, prevents structural damage, and keeps your outdoor space usable year-round. From French drains and dry wells to rain gardens and permeable pavers, there are reliable yard drainage solutions for every property type. If your drainage problems persist, consulting a professional ensures the system is installed correctly for long-term performance. A dry, healthy yard isn’t just possible — it’s achievable with the right drainage system for yard protection. FAQs How do I know if I need a backyard drainage system? You likely need a backyard drainage system if you notice water pooling after rain, soggy grass that doesn’t dry, soil erosion, foundation cracks, or basement moisture. Persistent water issues can damage both landscaping and your home’s structure if left untreated. What is the most cost-effective drainage system for a yard? Swales and simple French drains are often the most cost-effective drainage systems for yard areas. Swales require minimal materials and use natural grading, while French drains provide long-term water control at a moderate installation cost. Can poor yard drainage damage my foundation? Yes. Poor yard drainage can lead to water accumulating around your foundation, which increases hydrostatic pressure. Over time, this can cause cracks, shifting, and even basement flooding. Installing proper yard drainage solutions helps protect your home’s structural integrity. Are lawn drainage solutions environmentally friendly? Many lawn drainage solutions are eco-friendly. Rain gardens, permeable pavers, and dry wells help reduce runoff and promote groundwater recharge. These options manage water naturally while improving landscape health. How long does a backyard drainage system last? A professionally installed backyard drainage system can last 20–30 years or more, depending on materials and maintenance. Regular inspections and clearing debris from drains help extend system life and maintain performance.

Plumber repairing a drain pipe under a bathroom sink showing signs of a failing drain line.

What Are the Signs of a Failing Drain Line?

A failing drain line usually shows up through slow drains, recurring clogs, foul odors, gurgling sounds, or unexpected water damage. Catching these warning signs early can help you avoid major plumbing repairs and costly property issues. If you’re noticing multiple drainage problems at once, your drain line may already be weakening beneath the surface and needs professional attention fast. Signs of a Failing Drain Line 1. Slow Drains That Keep Coming Back One of the earliest signs of a failing drain line is water draining slowly from sinks, tubs, or showers, even after cleaning. Persistent slow drainage often points to deeper pipe damage or buildup. When slow drains return repeatedly, it’s rarely just a simple clog. In many cases, the drain line has cracks, corrosion, or root intrusion that blocks proper water flow over time. 2. Frequent Clogs in Multiple Fixtures If more than one drain in your home keeps clogging, the issue may not be localized. Multiple backups often indicate a larger problem in the main drain line system. This pattern is a strong warning sign because isolated clogs usually affect one fixture. But widespread clogging suggests the main line is struggling, failing, or partially collapsed underground. 3. Bad Odors Coming From Drains Sewage-like smells coming from your drains are never normal. These odors often happen when waste water cannot move through the drain line properly, causing buildup and bacterial growth. A failing drain line may have cracks or blockages that trap debris. The longer it sits, the worse the smell becomes, signaling a need for inspection and repair. 4. Gurgling Noises and Air Bubbles Strange gurgling sounds from toilets or drains can mean trapped air in the plumbing system. This happens when wastewater flow is disrupted by blockage or pipe deterioration. At this stage, many homeowners begin considering drain pipe replacement because these noises often suggest structural issues, not just surface-level clogs. 5. Water Backups or Overflow Problems Water backing up into tubs, showers, or floor drains is one of the clearest signs of drain line failure. Backups often occur when the pipe can no longer carry waste away efficiently. This is more than an inconvenience—it can become a health hazard. Sewage exposure and water damage can escalate quickly, so immediate professional help is critical. 6. Unexplained Water Damage or Mold Growth Failing drain lines can leak behind walls or beneath floors without obvious signs at first. Over time, hidden leaks cause staining, warped flooring, and mold growth. If you notice damp spots, musty smells, or sudden mold patches, your drain line could be cracked or broken, allowing moisture to collect inside your home structure. 7. Soggy Patches or Sinkholes in the Yard Outdoor warning signs are common with underground drain line damage. If parts of your yard are unusually wet, smelly, or sunken, wastewater may be leaking below the surface. These issues often point to a broken sewer or drain line. Addressing them early helps prevent major excavation costs and property damage. 8. Higher Water Bills Without Explanation A damaged drain line can waste water through unnoticed leaks, leading to an unexpected rise in your utility bill. Even small cracks can cause significant long-term water loss. If your bill increases but your water usage hasn’t changed, it’s smart to schedule a drain line inspection to rule out hidden plumbing failure. Signs You Should Schedule a Professional Drain Inspection If you’re experiencing repeated clogs, odors, gurgling, or water damage, it may be time to call a trusted drainage specialist. Professionals use camera inspections to pinpoint failures accurately. For homeowners in Jacksonville, you can review these detailed warning signs you may need drain replacement to understand when urgent action is necessary. Why Trust Matters With Drain Line Repairs Drain line problems require expert diagnosis, not guesswork. Experienced contractors know how to detect pipe collapse, root intrusion, and long-term corrosion before repairs become emergencies. For added confidence, you can also explore WeatherTek’s verified business profile through this trusted contractor listing to see their service credibility and customer-focused reputation. Final Thoughts: Don’t Ignore Drain Line Warning Signs The signs of a failing drain line usually start small—slow drainage, odors, and clogs—but they can quickly become major backups or property damage. Early detection saves money and stress. If you suspect drain trouble, acting quickly with a professional evaluation is the best way to protect your home and avoid costly replacements later.

Installing a French drain is one of the most effective DIY solutions for managing excess groundwater and preventing drainage issues.

How to Install a French Drain in Your Yard

Installing a French drain in your yard is a simple, cost-effective way to fix drainage issues and prevent water damage. This guide walks you through the essential steps—from planning and digging to laying the pipe and backfilling—so you can solve standing water problems quickly and efficiently, even with basic DIY skills. Tools and Materials Needed to Install a French Drain Before you start, gather the necessary tools and materials: Shovel or trenching machine Gravel or crushed stone Perforated pipe Landscape fabric Wheelbarrow Level Stakes and string Safety gear (gloves, goggles, etc.) 9 Steps Installing a French Drain in the Yard 1. Plan the Drainage Path Start by determining where the water collects and where you want it to go. Use stakes and string to mark the drainage path. Ideally, the trench should lead to a lower area in your yard, a drainage ditch, or a dry well. Ensure the path avoids utility lines and other underground obstacles. 2. Measure the Slope For a French drain to work effectively, it needs to have a slight slope that encourages water to flow. A slope of 1% (1 foot of drop for every 100 feet of length) is usually sufficient. Use a level and measuring tape to ensure the trench has the correct gradient. 3. Dig the Trench Using a shovel or trenching machine, dig a trench along the marked path. The trench should be about 18 to 24 inches deep and 12 inches wide. Adjust the depth if needed, depending on the severity of your drainage issue. 4. Add Landscape Fabric Line the trench with landscape fabric. This step is crucial as it prevents soil from clogging the gravel and perforated pipe. Leave enough fabric on either side to wrap over the top of the gravel layer later. 5. Lay the Gravel Base Add a layer of gravel or crushed stone at the bottom of the trench. This layer should be about 2 to 3 inches deep. Use a wheelbarrow to transport the gravel and a rake to spread it evenly. 6. Install the Perforated Pipe Place the perforated pipe on top of the gravel layer with the holes facing downward. The perforations allow water to enter the pipe, while gravity and the slope help it flow away. Connect multiple pipe sections using couplers, if necessary. 7. Cover the Pipe with Gravel Add more gravel on top of the pipe, filling the trench to within a few inches of the ground level. This gravel layer promotes drainage and prevents soil from directly clogging the pipe. 8. Wrap the Landscape Fabric Fold the excess landscape fabric over the top of the gravel layer. This step further prevents soil intrusion, keeping the French drain functional for years. 9. Backfill the Trench Cover the trench with the soil you initially removed, leaving the surface slightly mounded to allow for natural settling over time. You can also add grass seed or sod to restore the appearance of your yard. Conclusion Building a French drain in your yard is a cost-effective way to solve drainage problems and protect your property. By following the steps outlined above, you can create a reliable system that efficiently redirects water away from your home and yard. If you’re not comfortable taking on the project yourself, consider consulting a French drain service to ensure a successful installation. With proper planning and maintenance, your French drain will keep your yard dry and functional for years to come. FAQs What is a French drain and how does it work? A French drain is a gravel-filled trench with a perforated pipe that redirects excess water away from your yard or home foundation using gravity. It helps prevent standing water, soil erosion, and basement flooding by collecting water and funneling it to a safe outlet. How do I know if my yard needs a French drain? Signs you may need a French drain include persistent standing water after rain, soggy or muddy lawn areas, water pooling near your foundation, or soil erosion in low-lying areas. How deep and wide should the trench be? Most French drain trenches are dug about 18–24 inches deep and 9–12 inches wide, but the depth may vary based on your yard’s drainage needs. Do I need a permit to install a French drain? Some municipalities may require permits for major drainage work, especially if it affects stormwater runoff or underground utilities — always check local codes before you start. Can I cover my French drain with grass or landscaping? Yes — once installed and covered with gravel, you can top the trench with soil and sod or decorative stones so the drain blends into your yard while still functioning.

Clogged drain repair under sink by professional plumber in Florida

How Much Does Clogged Drain Repair Cost in Florida?

Clogged drain repair in Florida typically costs $150 to $600, depending on clog severity, drain location, repair method, and whether pipe damage or root intrusion is involved. Severe blockages or collapsed lines can exceed $1,000. Average Cost of Clogged Drain Repair in Florida Most Florida homeowners pay $200–$450 for professional clogged drain repair, with basic cleaning on the lower end and advanced repairs or excavation on the higher end. Florida’s sandy soil, high water table, and heavy rainfall contribute to frequent drain issues. Minor clogs in sinks or tubs are cheaper, while outdoor drains, sewer lines, or French drains cost more due to labor and equipment. Licensed contractors typically include inspection, clearing, and flow testing in the price. What Factors Affect Clogged Drain Repair Costs Repair costs depend on clog location, pipe material, blockage severity, accessibility, and whether structural damage or root intrusion is present. A simple kitchen clog is much cheaper than a blocked yard drain or sewer line. Older homes with clay or cast-iron pipes often need more intensive work. Florida properties with mature landscaping frequently face root intrusion, which raises costs and may require camera inspections or pipe replacement. Cost by Type of Drain Being Repaired Sink and tub drains cost less to repair than floor drains, outdoor drains, or sewer lines due to easier access and simpler cleaning methods. Kitchen or bathroom sink: $150–$300 Shower or tub drain: $150–$350 Floor drain: $250–$500 Outdoor or yard drain: $300–$700 Main sewer line: $400–$1,200+ Homeowners seeking clogged drain repair in Jacksonville often face higher costs for outdoor drainage systems due to soil shifting, storm water overload, and aging infrastructure. Common Causes of Clogged Drains in Florida Homes The most common causes are grease buildup, hair, soap residue, sand, tree roots, and storm debris entering outdoor drains. Florida’s environment plays a big role. Heavy rain pushes sediment into drains, while palm roots and oak trees invade underground lines. Coastal homes may also experience mineral buildup and corrosion from salt air, especially in older plumbing systems. Drain Cleaning vs Drain Repair: Cost Differences Drain cleaning costs less than drain repair, but repairs are necessary when pipes are damaged, collapsed, or invaded by roots. Drain cleaning ($150–$300) removes buildup using snaking or hydro-jetting. Drain repair ($400–$1,500+) is required when pipes crack, collapse, or shift. Ignoring repeated clogs often leads to structural damage, which increases long-term costs significantly. If the issue involves soil movement or pipe failure, you may need a deeper solution similar to those explained in this guide on how to repair a collapsed drain field. Is Hydro Jetting Worth the Cost in Florida Yes, hydro jetting is worth the cost for recurring or severe clogs, especially in Florida’s high-debris drainage systems. Hydro jetting typically costs $300–$600 but provides a long-lasting solution by fully clearing pipe walls. It’s highly effective against grease, roots, and sediment. Many Florida drainage professionals recommend it as preventive maintenance for homes prone to backups. Emergency Clogged Drain Repair Costs Emergency clogged drain repair in Florida costs 20%–50% more due to after-hours labor and urgent response requirements. Weekend, holiday, or same-day emergency services can push costs beyond $800, especially if flooding is involved. Acting early at the first sign of slow drainage helps avoid emergency pricing and potential water damage to floors, foundations, and landscaping. How to Tell If a Clog Is Becoming a Bigger Problem Multiple slow drains, foul odors, gurgling sounds, or standing water indicate a deeper drainage issue that requires professional inspection. These symptoms often signal blocked main lines or failing drainage systems. Delaying repairs can lead to soil erosion, pipe collapse, or foundation damage—repairs that cost far more than early intervention. Can Regular Maintenance Reduce Drain Repair Costs Yes, routine drain maintenance can prevent major clogs and reduce repair costs by hundreds or even thousands of dollars. Annual inspections and professional cleaning keep debris from accumulating and identify weak points early. Many Florida homeowners save significantly by investing in maintenance instead of reacting to emergencies. This is explained clearly in how regular drainage service can save you thousands in repairs. Final Thoughts Florida homeowners should budget $250–$600 for most clogged drain repairs and plan for higher costs if outdoor or structural drainage issues exist. Addressing clogs early, scheduling preventive maintenance, and working with experienced drainage professionals helps control costs and protect your property long-term. When it comes to drainage in Florida, proactive care is always cheaper than emergency repairs. Frequently Asked Questions (FAQs) What is the average cost of professional drain cleaning? Professional drain cleaning usually costs $150 to $300 for standard residential drains. Advanced methods like hydro jetting or camera inspections may increase the total cost but provide longer-lasting results. Why is clogged drain repair more expensive in Florida? Florida’s sandy soil, heavy rainfall, high water table, and aggressive tree roots increase clog frequency and pipe damage, making repairs more complex and labor-intensive compared to other states. How long does clogged drain repair take? Most clogged drain repairs take 1 to 3 hours, depending on clog severity and drain location. Complex issues like root intrusion or collapsed pipes may take several hours or require multiple visits. Can I fix a clogged drain myself to save money? Minor clogs may be fixed with DIY methods, but repeated or severe clogs should not be ignored. DIY attempts can worsen pipe damage, leading to higher repair costs and potential water damage. What causes recurring drain clogs in Florida homes? Recurring clogs are commonly caused by tree root intrusion, grease buildup, soil movement, aging pipes, and storm debris, especially in outdoor and yard drainage systems. How much does emergency clogged drain repair cost? Emergency drain repair in Florida can cost 20%–50% more than standard service due to after-hours labor, urgent response, and potential flood mitigation requirements. What is the most expensive drain repair homeowners face? The most expensive drain repair involves collapsed or severely damaged sewer lines, which can cost $2,000 or more if excavation or pipe replacement is required. Does clogged drain repair increase

Close-up of seamless gutter system with mesh gutter guard preventing leaves and debris buildup

How Do Seamless Gutters Work Compared to Regular Gutters

Seamless gutters work by directing rainwater through a single, continuous channel custom-fit to your home, reducing leaks and clogs—while regular gutters use multiple joined sections that are more prone to failure over time. The key difference is fewer seams, better durability, and lower long-term maintenance with seamless systems. Understanding How Regular (Sectional) Gutters Work Regular gutters are assembled from multiple pre-cut sections joined together along the roofline, which creates seams that can weaken over time and allow water to escape. Traditional sectional gutters are sold in standard lengths and connected during installation using fasteners and sealants. While initially affordable, these joints are natural weak points. As debris builds up and weather causes expansion and contraction, seams may loosen, leading to leaks, sagging, and water damage around the foundation. How Seamless Gutters Function Differently Seamless gutters are formed on-site from a single piece of metal, eliminating most joints and creating a smooth channel that moves water efficiently away from your home. A specialized machine shapes aluminum, copper, or steel to the exact dimensions of your roof. Because seams only exist at corners and downspouts, the system handles heavy rainfall more effectively and significantly reduces the chance of leaks or clogs. Why Fewer Seams Make a Big Performance Difference Fewer seams mean fewer failure points, allowing seamless gutters to handle higher water volumes while minimizing leaks, corrosion, and debris buildup over time. Seams are where leaves collect and sealant breaks down. With seamless gutters, water flows freely, even during intense storms—making them ideal for areas like Northeast Florida where sudden downpours are common. This efficiency directly protects fascia boards, siding, and foundations. Cost Comparison: Upfront vs Long-Term Value Regular gutters cost less upfront, but seamless gutters often deliver better long-term value due to lower maintenance, fewer repairs, and longer lifespan. Homeowners searching for seamless gutter services in Jacksonville florida often discover that while seamless systems cost more initially, they save money by avoiding repeated resealing, replacement sections, and water-damage repairs caused by leaking joints. Installation Expertise Matters More with Seamless Systems Seamless gutters require professional measurement, fabrication, and installation, ensuring a precise fit that improves performance and appearance. Unlike DIY-friendly sectional gutters, seamless systems demand experience and specialized equipment. Reputable contractors assess roof pitch, drainage patterns, and local rainfall conditions to ensure optimal water flow—an important E-E-A-T signal showing expertise and real-world experience. Durability and Lifespan Comparison Seamless gutters typically last longer than regular gutters because their one-piece design reduces stress, rust, and separation caused by weather exposure. Sectional gutters often need repairs every few years due to joint failure. Seamless gutters, when installed correctly, can last 20+ years with minimal upkeep, making them a trusted solution recommended by roofing and drainage professionals. Maintenance Needs: Which Is Easier to Care For? Seamless gutters require less maintenance because debris is less likely to snag at joints, reducing clogs and overflow issues. Regular gutters need frequent inspections at each seam to check for leaks or separation. With seamless systems, routine cleaning and occasional inspections are usually enough—saving homeowners time and ongoing maintenance costs. Visual Appeal and Home Value Impact Seamless gutters offer a cleaner, more streamlined look that enhances curb appeal and complements modern home exteriors. Because they’re custom-made, seamless gutters fit tightly against the roofline and come in various colors. This subtle aesthetic upgrade can positively influence resale value, especially when buyers prioritize low-maintenance exterior features. Weather Performance in High-Rainfall Areas Seamless gutters perform better during heavy rainfall by moving water quickly and consistently without overwhelming joints or causing overflow. In storm-prone regions like Jacksonville, gutter performance is critical. Seamless systems are designed to manage sudden water surges, reducing erosion, basement moisture, and foundation stress—issues commonly caused by failing sectional gutters. Seamless vs Sectional: Which One Is Right for You? The right choice depends on budget, long-term goals, and local weather, but seamless gutters are generally the better investment for durability and reliability. For a deeper breakdown of materials, performance, and real-world use cases, explore this in-depth guide on sectional vs seamless gutter systems and their long-term performance differences. Professional Insight: What Experts Recommend Most gutter professionals recommend seamless systems for homeowners who want fewer problems, better drainage, and long-term peace of mind. Industry insights consistently show that seamless gutters outperform sectional systems in leak prevention and lifespan. According to broader water-management trends, effective exterior drainage is becoming a priority for protecting homes from climate-related risks—something highlighted in this expert outlook on landscape drainage and water management trends. Final Thoughts: Making a Confident Gutter Decision Seamless gutters work differently—and better—than regular gutters by eliminating weak points, improving water flow, and reducing maintenance. While sectional gutters may seem cost-effective initially, seamless systems provide superior performance, durability, and protection for your home. If you value long-term reliability, professional installation, and reduced upkeep, seamless gutters are not just an upgrade—they’re a smarter solution backed by experience, expertise, and industry trust.

Plumber inspecting leaking drain pipe under kitchen sink with homeowner

How to Fix a Leaking Kitchen Sink Pipe Yourself?

A leaking drain pipe under the kitchen sink is the kind of thing you never notice until… well, until you’re standing in a puddle, muttering under your breath, and wondering how much worse this situation can get. Don’t panic—take a deep breath and grab a towel. Fixing a leaking pipe isn’t as intimidating as it sounds. In fact, with the right approach, you can handle this issue like a pro without calling an emergency plumber (and emptying your wallet). Let’s break it down step by step. Step 1: Turn Off the Water Supply First things first—turn off the water supply. While you technically don’t need to shut off the entire house’s water for this fix, it’s smart to close the faucet valves under the sink. These are typically located right below your sink basin. If you skip this step, you might end up with water gushing everywhere when you start disassembling the pipe. No one wants that. Step 2: Place a Bucket Underneath A leaking pipe under the sink means there’s probably still some water sitting in the system. Place a bucket or bowl directly under the area you’ll be working on to catch any water that might spill out when you loosen the pipe. Trust me, this small step will save you a ton of cleanup later. Step 3: Loosen the Connections Most modern kitchen sink pipes are made from PVC or a similar plastic material, which makes them relatively easy to work with. If the leak is coming from a joint, you’ll want to unscrew the slip nuts (the rings that connect the pipe sections). Use your wrench or pliers to loosen them. Be gentle—PVC is durable, but you don’t want to crack it by applying too much pressure. If your pipes are metal, like older galvanized steel, you might need a pipe wrench and a bit more elbow grease. Don’t forget to take note of how the pieces fit together. Snapping a photo on your phone before disassembling can help make reassembly easier. Step 4: Inspect the Problem Once you’ve separated the pipes, inspect the issue. Look for: Worn-out gaskets: Rubber washers or gaskets inside the connections often deteriorate over time. A cracked or flattened gasket can easily cause leaks. Loose connections: Sometimes, all you need to do is tighten the slip nuts a little more securely. Cracks in the pipe: A hairline crack or a small hole in a pipe section may require more than a simple adjustment—you’ll need to patch or replace the damaged piece. This step is key to choosing the right drainage solution for your specific problem. Step 5: Apply a Fix Depending on what you’ve found, here’s how to address the issue: Loose Connections Rewrap the threads of the pipe with plumber’s tape to ensure a watertight seal. Then, reattach the pipes, tightening the slip nuts securely. Don’t overtighten; you want it snug but not strained. Worn-Out Gaskets If the gasket is the problem, replace it with a new one. Gaskets are inexpensive and available at any hardware store. Simply pop the old one out, insert the new one, and reassemble the pipe. Cracked Pipe For small cracks or holes, you can use plumber’s putty or a silicone sealant to patch the area temporarily. This is a great short-term drainage solution if you need to buy some time before replacing the pipe entirely. For a permanent fix, you’ll need to replace the damaged section of the pipe. If it’s PVC, use pipe cleaner and glue to connect the new piece. Step 6: Test the Repair Once everything is back in place, it’s time to test your handiwork. Run water through the sink while keeping an eye on the pipe connections. Is there any dripping? If not, congratulations—you’ve successfully fixed your leak! If you still see water escaping, double-check the connections and seals, and tighten as needed. When to Call a Plumber Call a plumber if the leak won’t stop, water keeps pooling, moisture persists even when the tap is off, or DIY fixes fail — these signs often mean a deeper issue needing professional repair. Final Thoughts Fixing a leaking pipe under kitchen sink doesn’t have to be a daunting task. With a little patience, the right tools, and some basic know-how, you can solve most minor leaks on your own. Plus, there’s nothing quite as satisfying as tackling a home repair and seeing the results of your efforts (not to mention the money you’ll save).

Pooled water on damaged ground indicating a collapsed drain field

How to Repair a Collapsed Drain Field?

A drain field, also known as a leach field, is a critical component of a septic system. It’s responsible for filtering wastewater that flows from the septic tank, allowing clean water to safely seep into the soil. Over time, however, drain fields can collapse or become clogged, leading to unpleasant odors, pooling water, and even sewage backups. In this blog, we’ll guide you through the steps needed to repair a collapsed drain field, including when to call a professional drainage service, and outline the potential drain repair solutions available. What Causes Drain Field Collapse? Before jumping into the repair process, it’s essential to understand the factors that contribute to a drain field collapse. Some common causes include: Excessive Water Load: A significant amount of water entering the drain field can overwhelm it, causing it to collapse or clog. Tree Roots: Trees and large shrubs can penetrate and damage drain field pipes, causing blockages and eventually collapse. Poor Soil Conditions: Certain soils, such as clay, are less permeable and may prevent water from draining properly, increasing the likelihood of drain field failure. Age and Wear: Drain fields typically last 20-30 years, depending on maintenance and usage. Over time, natural wear can lead to collapse. Signs of a Collapsed Drain Field A collapsed drain field won’t fix itself and often worsens if left untreated. Knowing the symptoms of a failing drain field can help you act quickly and reduce repair costs. Some common signs include: 1. Pooling Water: Water pooling on the ground around the drain field is a common indicator of a failure. 2. Unpleasant Odors: If you notice strong sewage smells, it’s likely that wastewater isn’t being absorbed properly. 3. Slow Draining Fixtures: Toilets, sinks, and showers may drain slowly due to a backed-up septic system. 4. Lush Patches of Grass: Inconsistent grass growth above the drain field can indicate excess moisture, suggesting wastewater is not draining properly. Once you recognize these symptoms, it’s essential to take action promptly to avoid further complications. Step-by-Step Guide to Repairing a Collapsed Drain Field 1. Assess the Damage The first step is to assess the extent of the damage. If you’re dealing with minor clogs, you might not need a full repair. On the other hand, a significant collapse could require professional intervention. Here’s how to conduct a basic inspection: Walk the Area: Look for any visual signs of damage, including pooling water, sunken soil, or visible breaks in the drain field pipes. Check for Odors: Strong odors are usually a sign of a backed-up or failing drain field. Test Drains: Check indoor drains to see if they’re working correctly. Slow drainage could indicate a deeper issue. If you identify multiple issues, such as both pooling water and foul odors, it may be best to consult a drainage service for a comprehensive inspection. 2. Clear Clogs in Drain Field Pipes Minor blockages in the drain field pipes can often be cleared with proper maintenance. This process can improve drainage and alleviate some of the symptoms of drain field failure. Here’s how to clear clogs: Hydro Jetting: A high-pressure water jet can be used to dislodge debris and flush out clogs in the drain field pipes. Hydro jetting is effective, but it requires specialized equipment and is best performed by a drain repair professional. Bacterial Additives: Adding septic-safe bacteria can help break down organic materials in the drain field, improving the soil’s ability to absorb water. This step is particularly useful if the drain field collapse is primarily due to buildup and clogs. However, if the damage is structural, you may need more extensive repairs. 3. Replace Damaged Drain Field Pipes If the pipes in your drain field have cracked or collapsed, simply clearing the clogs won’t be enough. Replacing damaged pipes is essential to restore functionality. Follow these steps to replace pipes: Excavate the Area: Dig carefully around the affected section to expose the damaged pipes. Remove the Damaged Pipe: Cut out the section of the pipe that’s broken. Be sure to remove any additional debris or roots that may have contributed to the collapse. Install New Pipe: Replace the broken pipe with new perforated PVC piping. Ensure that the pipe is properly aligned to allow wastewater to flow evenly throughout the drain field. Backfill the Excavation: Carefully cover the area with soil, avoiding compacting the ground too much, as compact soil can reduce drainage. This is a more extensive repair that may require the expertise of a drainage service, particularly if you’re unfamiliar with septic systems. 4. Improve Drain Field Soil Drainage In some cases, poor soil conditions can prevent water from being absorbed, contributing to drain field failure. Improving soil drainage may resolve or prevent issues with your drain field. Here’s how: Soil Aeration: Use an aerator or similar tool to introduce air pockets into the soil. Aeration can improve water flow and soil permeability. Sand and Gravel Layer: Adding a layer of sand and gravel beneath the drain field can help create a more permeable surface, allowing wastewater to drain more efficiently. Permeable Soil Additives: Certain additives can improve soil structure, making it easier for water to move through the soil and into the drain field. By improving soil drainage, you can create a more conducive environment for wastewater absorption, which reduces the likelihood of future collapse. 5. Prevent Future Drain Field Collapse Prevention is always better than repair, and maintaining your drain field can save you significant time and money. Here are some effective preventative steps: Limit Water Usage: Avoid sending excessive water into the septic system, as this can overwhelm the drain field. Avoid Planting Trees Nearby: Tree roots are a common cause of pipe damage in drain fields. Keep trees and shrubs at least 20-30 feet away. Schedule Regular Inspections: Routine inspections by a drainage service can help you catch minor issues before they escalate. Practice Proper Septic System Care: Avoid putting non-biodegradable materials, oils, or grease into your septic system, as these can clog the

Drainage worker in Jacksonville installing underground drain pipe using vacuum excavation equipment

What is the Best Solution for Drainage?

Let’s talk about something a lot of us probably don’t think about until it becomes a real headache—drainage. Whether you’re dealing with a soggy backyard, a flooded driveway, or a basement that feels more like an indoor pool, poor drainage can be a major hassle. And it’s not just about inconvenience. Ignoring drainage issues can lead to serious damage to your home, your garden, and even your wallet. So, what is the best solution for drainage? Well, let’s dive into it (pun intended) and explore some of the most effective options out there. 1. French Drains: The Classic Solution When it comes to effective drainage solutions, the French drain is a classic for a reason. Named not after the country but rather after Henry Flagg French, an American farmer, this system uses a gravel-filled trench with a perforated pipe to redirect water away from areas where it tends to accumulate. Imagine water that pools in your yard after every heavy rainfall. Instead of it sitting there, a French drain collects that water and directs it to a better location, like a storm drain or a dry well. They’re great for areas prone to flooding and can even help protect your foundation. Plus, they can be relatively easy to install, especially if you’re up for a bit of DIY. However, if DIY isn’t your thing—or if you want to ensure everything is perfectly placed—hiring a professional is a smart move. 2. Dry Wells: A Hidden Helper Another solution that deserves some love is the dry well. Think of a dry well as an underground reservoir that collects excess water and slowly lets it seep into the ground. Essentially, it’s like giving rainwater its own secret storage space until it’s ready to absorb naturally into the soil. Dry wells are perfect if you have a lot of runoff water and want to avoid erosion issues. They also prevent that dreaded standing water—aka mosquito heaven—in your yard. What’s more, they help to recharge the groundwater system in a natural way. It’s a win-win situation for you and the environment. 3. Sump Pumps: A Basement’s Best Friend If you have a basement, you probably know that water tends to find its way down there whenever it can. And when it does, sump pumps are the heroes that help get rid of it. Sump pumps are typically installed in a pit at the lowest point of your basement, where they collect and pump out any unwanted water to a location where it won’t do any harm. The best part about sump pumps is that they work automatically. As soon as water reaches a certain level, the pump kicks in and moves it out. Whether it’s a torrential downpour or a slow trickle, the sump pump can be a true lifesaver to keep your home safe from flooding. 4. Grading: Let Gravity Do the Work Sometimes the best solution is the simplest one—using gravity to your advantage. Grading is the process of reshaping the slope of your yard so that water naturally drains away from your house and other areas where you don’t want it to pool. If your property isn’t graded properly, it’s almost like inviting water to make itself at home right next to your foundation. This can cause all sorts of problems, like erosion, foundation cracking, and water damage. Getting a professional landscaper or contractor to help regrade your property is often worth the investment. Just make sure that the slope is directed away from your house at a safe angle—typically at least 1 inch per foot. 5. Rain Gardens: Eco-Friendly & Beautiful For those who want to combine function with aesthetics, rain gardens are an excellent option. A rain garden is a beautifully landscaped depression in your yard that’s filled with native plants and flowers, designed to absorb excess rainwater runoff. Instead of water flowing straight into the storm drain, it goes into your rain garden, where it gets absorbed naturally by the soil and plants. Not only does this help reduce flooding, but it also filters out pollutants and helps recharge the groundwater. Plus, it’s a fantastic way to bring more wildlife into your yard, attracting butterflies, birds, and bees—all while keeping things dry! 6. Permeable Pavers: A Modern Solution Traditional paving materials like asphalt and concrete can exacerbate drainage issues since they don’t allow water to soak into the ground. Permeable pavers, on the other hand, are designed to let water pass right through them, filtering down to the soil below. Installing permeable pavers is a great option if you want to redo your driveway, patio, or walkways in a way that helps improve drainage. They allow water to move through the surface, minimizing runoff and making sure that the ground beneath gets properly hydrated. How to Choose the Best Drainage Solution for Your Home? So, how do you decide which drainage solution is the best fit for you? It really comes down to the specific needs of your property and how much time, effort, or money you’re willing to invest. Here are a few things to keep in mind: Identify Problem Areas: Is the issue concentrated in your backyard, near your foundation, or your basement? Different areas often require different solutions. Budget Considerations: Some solutions, like grading, may involve significant costs upfront but can save you money down the road by preventing damage. Aesthetic Preferences: If you love gardening, a rain garden might be a beautiful and effective solution. For a more hidden approach, French drains and dry wells might suit your style. WeatherTek: Your Trusted Drainage Solution Partner If all this talk about drainage has you feeling a bit overwhelmed, don’t worry—you don’t have to do it alone. At WeatherTek, we specialize in providing expert drainage solutions that are tailored to fit the unique needs of your property. Whether you’re dealing with persistent basement flooding or yard areas that just won’t dry, our experienced team is here to help. From French drains to grading and everything in

Jacksonville's street drainage grate managing rainwater on wet pavement

Common Drainage Solutions for Your Home and Yard: Protect Your Property from Water Damage

Picture this: It’s been raining non-stop for days, and your yard has turned into a swampy mess. The lawn is soaked, there are puddles everywhere, and you’ve started to notice water seeping towards the foundation of your home. Not exactly ideal, right? If you’ve ever experienced these kinds of issues, it might be time to consider some effective drainage solutions. A well-planned yard drainage system can save your landscape and protect your home from potential damage. Whether you’re dealing with a swampy lawn, a flooded backyard, or water pooling around your house, it’s important to understand the different options available. Let’s dive into some common yard drainage solutions that can help you avoid these headaches. 1. French Drains: The Classic Yard Drainage Solution The French drain is one of the most popular and effective yard drainage solutions, particularly for areas that suffer from heavy water runoff. Essentially, a French drain consists of a gravel-filled trench with a perforated pipe running through it. This pipe redirects water away from problem areas and disperses it elsewhere, ensuring it doesn’t hang around in your yard or near your house foundation. French drains are particularly useful for backyard drainage solutions where there’s frequent water accumulation. They’re discreet and can be covered with grass or decorative stones, which means they won’t spoil the look of your yard. 2. Dry Creek Beds: A Natural and Beautiful Drainage Fix If you’re after something a bit more aesthetically pleasing, consider a dry creek bed. This solution mimics the look of a natural creek, with strategically placed stones and rocks that allow water to flow through them. It directs rainwater away from your home, providing a simple, attractive way to manage excess water. Dry creek beds not only work as effective backyard drainage solutions, but they also add a decorative element to your landscaping. Plus, they can be customized to fit any part of your yard, allowing them to blend seamlessly into your garden design. 3. Downspout Extensions: Keep Water Away from the Foundation Have you noticed that water tends to collect near the base of your house after a storm? The issue might lie with your downspouts. A great solution for this is to install downspout extensions, which help channel the water further away from your foundation. By directing runoff away from your house, you prevent the risks of basement leaks, foundation erosion, and mold growth. This is one of the simplest and most affordable drainage solutions you can implement. Extensions can be adjusted to the right length to ensure water ends up where it belongs—far away from your house. 4. Sump Pumps: A Solution for Excessive Water Problems For areas prone to excessive flooding or for homes with basement issues, installing a sump pump is a fantastic drainage solution. A sump pump collects water from the lowest point in your home, such as a basement or crawl space, and pumps it away from your property. This powerful yard drainage solution is especially helpful if you live in a region with a high water table or during particularly wet seasons. When heavy rain hits, your sump pump will automatically kick in and move unwanted water away from your home. 5. Swales: Nature’s Way of Managing Water Flow Swales are shallow, sloping ditches that help redirect water across your yard. They can be lined with grass, stones, or plants that not only manage the flow of water but also help slow down runoff and minimize erosion. Swales are an ideal option if you want a subtle, nature-friendly yard drainage solution. They can direct water toward gardens or specific drainage areas, and with the right plants, they can even enhance your landscape’s overall aesthetic. 6. Rain Gardens: Control Runoff and Help the Environment For a more eco-friendly approach, consider planting a rain garden. These gardens are designed with water-tolerant plants and are strategically located to absorb runoff from hard surfaces like roofs, driveways, and sidewalks. Rain gardens are great because they don’t just solve drainage problems—they also create a beautiful feature in your yard. By absorbing rainwater, these gardens help prevent soil erosion, reduce water pollution, and support local wildlife. It’s a win-win for you and the environment. 7. Catch Basins: Prevent Pooling in Low Areas If certain parts of your yard tend to hold onto water after a downpour, a catch basin might be the ideal backyard drainage solution. Catch basins are installed in low areas to collect rainwater and then funnel it through a system of underground pipes. This can help prevent pooling, muddy patches, and waterlogged grass, keeping your yard more usable year-round. How to Choose the Right Drainage Solution for Your Yard Now that we’ve covered some of the common drainage solutions, you might be wondering which one is right for your home. The best choice often depends on your yard’s layout, the type of soil, and the specific drainage problems you’re facing. Here are a few tips: Identify the problem areas: Walk around your property during or after a rainstorm to see where water is pooling. Are there spots where runoff collects? Does it flow towards your house? Consider your landscape: Think about the overall look you want for your yard. Do you want a natural solution like a rain garden, or would you prefer something more discreet like a French drain? Factor in maintenance: Some drainage solutions require more upkeep than others. A French drain may need occasional clearing, while rain gardens require seasonal maintenance. If you’re unsure, it’s always a good idea to seek professional help. Drainage issues can lead to serious problems if left unchecked, so it’s worth the investment to get expert advice. Why You Should Act Now Drainage problems don’t just go away on their own—in fact, they tend to get worse if ignored. Water pooling around your house can lead to foundation issues, rotting, mold growth, and more. Standing water in your yard can kill your grass, attract pests, and create muddy messes that no one wants to

Scroll to Top