Channel Drain

Modern channel drainage installed along a driveway to prevent water pooling

9 Benefits of Installing Channel Drainage Around Your Home

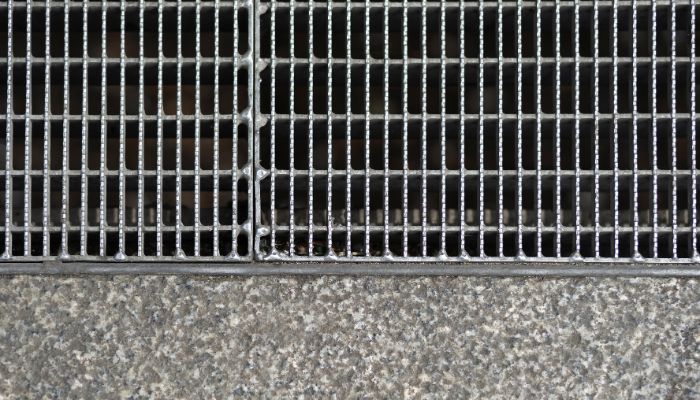
Excess water around your home can cause flooding, foundation damage, and landscape erosion. Installing a channel drainage system efficiently redirects runoff, protects your property, and improves safety. In this guide, we explore 9 key benefits of installing channel drainage and how it can safeguard your home while enhancing curb appeal. 1. Prevents Flooding and Water Pooling One of the biggest benefits of channel drainage is its ability to redirect surface water away from problem areas. Driveways, patios, and garden paths often collect water after heavy rainfall, leading to slippery surfaces and puddles. A well-designed driveway drain channel captures runoff efficiently and directs it to the nearest outlet, keeping your outdoor areas dry, safe, and functional all year long. 2. Protects Your Foundation from Water Damage When rainwater collects near your foundation, it can seep into cracks, causing structural damage and costly repairs. Over time, this can weaken the base of your home and lead to basement leaks or mold growth. By adding channel drainage around the perimeter of your property, you’re ensuring that water flows away from your foundation, minimizing moisture buildup and long-term risks. 3. Increases Property Value and Curb Appeal Homeowners looking to boost the value of their property can benefit from channel drain installation. A properly installed drainage system enhances both function and aesthetics. It eliminates unsightly water marks, prevents driveway erosion, and adds a polished, professional touch to your landscape. 4. Keeps Driveways and Walkways Safe Standing water on driveways and walkways creates slippery, unsafe conditions. In colder climates, it can also lead to ice buildup and cracks in your pavement. Installing a driveway drain channel helps prevent these issues by diverting water before it becomes a hazard. This simple addition can make a huge difference in everyday safety, especially for homes with sloped or paved surfaces. 5. Prevents Erosion and Landscaping Damage Without proper drainage, rainwater can wash away topsoil, mulch, and plants from your garden. Over time, this erosion not only ruins your landscaping but can also expose underground utilities or create uneven ground. Channel drainage acts as a protective barrier, channeling excess water into a controlled system that maintains the beauty and health of your outdoor space. 6. Reduces Maintenance Costs Water buildup often leads to frequent maintenance — from cleaning up flooded driveways to repairing cracked patios. Installing a channel drain system reduces these repetitive chores and expenses. Once the system is in place, it works automatically to manage runoff, saving you both time and money in the long run. 7. Enhances Stormwater Management Heavy storms can overwhelm standard drainage systems, especially in low-lying areas. A properly installed channel drainage system ensures that stormwater is efficiently collected and directed away, reducing the risk of overflow or localized flooding. This is particularly beneficial for homes in regions prone to heavy rainfall or tropical weather, where fast-moving drainage is essential for protection. 8. Extends the Life of Outdoor Surfaces Constant exposure to standing water weakens concrete, pavers, and asphalt surfaces. Over time, you’ll notice cracks, discoloration, or surface deterioration. By installing channel drains, you extend the lifespan of these outdoor materials. Less water exposure means less damage, fewer repairs, and a longer-lasting finish for your driveways, walkways, and patios. 9. Offers a Low-Profile, Stylish Solution Many homeowners hesitate to install drainage systems due to aesthetic concerns — but modern channel drainage designs are sleek, low-profile, and blend seamlessly into any surface. Whether you prefer stainless steel, polymer concrete, or decorative grates, there are many style options that complement your outdoor design while providing powerful functionality. Why Homeowners Choose Channel Drainage Over Traditional Systems Traditional drainage solutions like French drains or simple grates often lack the capacity to handle surface runoff efficiently. Channel drainage, on the other hand, is designed for high-volume collection and smooth water flow, making it ideal for driveways, patios, and pool decks. It’s also easier to clean and maintain, with removable grates that allow quick access for debris removal — ensuring long-term performance with minimal effort. Protect Your Home from Water Damage If you notice water pooling near your home, garage, or driveway, it’s time to take action. Installing a channel drainage system not only protects your property but also enhances your home’s look and safety. By preventing erosion, structural damage, and costly repairs, this simple upgrade provides peace of mind and long-term value. For homeowners seeking expert installation, professional drainage contractors can ensure precise design and placement for optimal performance. Whether you’re upgrading an existing system or installing new drains, investing in proper drainage today can save thousands in future repairs. Key Takeaway A channel drain is more than a drainage accessory — it’s a vital safeguard for your home’s health and appearance. From preventing flooding to improving curb appeal, the benefits are long-term and substantial. When you’re ready to take the next step, explore how to install channel drain effectively with this detailed installation guide, or contact a local drainage expert to get professional help tailored to your property.

Stainless steel channel drain in outdoor kitchen flooring near appliances

14 Creative Channel Drain Designs to Enhance Your Outdoor Space

Outdoor spaces often face challenges with water drainage, but modern solutions make it possible to manage runoff without sacrificing style. Channel drains are no longer just functional systems; they are now designed to enhance the beauty, safety, and durability of patios, driveways, pool decks, and gardens. With creative options ranging from sleek linear grates to decorative stone or metal finishes, homeowners can integrate drainage systems that blend seamlessly into their landscaping. Exploring innovative channel drain designs ensures both effective water management and an outdoor space that feels polished and inviting. Why Channel Drains Matter in Outdoor Design Channel drains are long, narrow systems designed to manage excess water, keeping patios, driveways, pool decks, and gardens free from flooding. Beyond their practical purpose, they contribute to the longevity of hardscape surfaces by preventing erosion and water pooling. Thoughtfully selected designs can also enhance the aesthetic appeal of walkways, gardens, or outdoor kitchens without compromising efficiency. Integrating Function with Aesthetics Today’s outdoor living trends prioritize both beauty and utility. A designer channel drain for landscaping provides seamless integration by ensuring smooth water flow while complementing the style of your hardscape. Whether you prefer a minimalistic modern look or decorative patterns that make a statement, there are options that strike the right balance between performance and design. 1. Sleek Linear Grates for Modern Patios Linear grates with clean lines are ideal for contemporary patios. Their low-profile appearance blends effortlessly with stone pavers or concrete flooring, providing an elegant drainage option that doesn’t distract from the design. 2. Decorative Cast Iron Covers For homeowners who appreciate artistry, cast iron channel drain covers come in intricate patterns—floral, geometric, or even custom motifs. These durable covers act as subtle design statements while maintaining structural strength. 3. Stone-Inlay Drains Stone-inlay drains allow you to match channel covers with the same material as your patio or walkway. By embedding stone or tile into the grate, you can achieve a nearly invisible drainage system that looks natural and cohesive. 4. Stainless Steel Finishes for Outdoor Kitchens Outdoor kitchens require a combination of durability and elegance. Stainless steel channel drains resist corrosion, complement appliances, and give a polished finish to cooking areas while keeping the flooring safe from grease and water runoff. 5. Wood-Look Covers for Decks For wooden decks, designers often use wood-grain channel drain covers that blend with the planks. These covers mimic the texture and tone of wood while being constructed from weather-resistant materials. 6. Minimalist Slot Drains Slot drains are narrow and nearly invisible, making them an excellent choice for minimalist landscapes. Their discreet design ensures effective water management without interrupting the clean look of your outdoor flooring. 7. Permeable Paver Integration Channel drains can also be integrated with permeable paver systems. This design choice not only enhances sustainability but also promotes efficient drainage while complementing eco-friendly landscaping solutions. 8. Mosaic Tile Accents For poolside areas or artistic patios, channel drains with mosaic tile inlays add a splash of creativity. Designers often match or contrast the colors with surrounding surfaces to achieve a bold visual statement. 9. Natural Stone Trench Covers Natural stone channel covers bring a rustic charm to gardens, pathways, or courtyards. Their rugged textures and earthy tones make them blend seamlessly with landscaping while still providing dependable drainage. 10. Glass-Top Designs for Modern Spaces Tempered glass channel drain covers are rare but striking in luxury outdoor settings. Often paired with LED lighting, these drains transform functional elements into conversation pieces. 11. Brick-Pattern Covers for Driveways Driveways benefit from heavy-duty channel drains, and brick-pattern grates offer both strength and style. They create continuity between paved surfaces while maintaining structural durability. 12. Recessed Plant Bed Drains Innovative designs now include recessed drains placed near plant beds or garden borders. These systems allow efficient water diversion while appearing as natural garden features, merging function with greenery. 13. Custom Laser-Cut Metal Designs Laser-cut channel covers offer endless customization possibilities. Homeowners can choose patterns inspired by leaves, waves, or cultural symbols, turning functional infrastructure into decorative art. 14. Multi-Material Combinations For unique outdoor spaces, some designers combine materials like stainless steel with stone or wood elements. This hybrid design enhances durability while highlighting creative architectural expressions. Factors to Consider Before Choosing a Channel Drain Design While exploring creative options, it’s essential to consider practicality. Factors like load-bearing capacity, slip resistance, weather durability, and ease of cleaning influence the long-term success of your channel drain system. Proper installation ensures that water flows effectively, preventing blockages and extending the lifespan of both the drain and surrounding landscape. Enhancing Outdoor Spaces with Thoughtful Choices Channel drains no longer need to be hidden or overlooked. With today’s wide range of designs, you can select a system that reflects your personal style while ensuring effective drainage. Whether you lean toward minimalist slot drains or bold, decorative grates, the right choice will elevate your outdoor living space. Final Thoughts A well-designed channel drain system does more than manage water—it transforms outdoor functionality into an opportunity for creative expression. From sleek modern solutions to artistic custom covers, there are countless ways to make this practical feature a highlight of your landscape. By carefully selecting the right design, you can enhance both the beauty and durability of your outdoor environment, ensuring it remains inviting, safe, and stylish for years to come. FAQs What are channel drains and why are they important for outdoor spaces? Channel drains are long, narrow drainage systems that collect and redirect surface water, preventing flooding, erosion, and damage to patios, driveways, and gardens. They are essential for maintaining both the safety and longevity of outdoor surfaces. Can channel drains be designed to match the style of my landscape? Yes, modern channel drains come in a variety of styles, from minimalist slot drains to decorative cast iron or stone-inlay covers. These options allow you to blend drainage systems seamlessly with your overall outdoor design. Are channel drains difficult to install in residential landscapes? With professional guidance, channel drain installation is straightforward. Placement

Simple Steps to Install a Channel Drain Yourself

Simple Steps to Install a Channel Drain Yourself

Installing a channel drain is easier than you think—no pro needed. In this quick guide, you’ll learn the simple, step-by-step process to install a channel drain yourself with basic tools and clear results. Whether you’re managing heavy rain runoff or improving your home’s drainage system, this DIY project can be done in a weekend. Step 1: Gather Your Materials and Tools Before beginning your channel drain installation, you’ll need to collect all the necessary materials. Having everything on hand ensures a smooth workflow without unnecessary delays. Here’s what you’ll need: Channel drain kit (including grate and end caps) Shovel or trenching tool Level PVC or corrugated drainpipe Gravel or sand Concrete mix (if installing in a concrete area) Safety gear (gloves, safety glasses, and knee pads) Measuring tape and chalk or marking spray Once you have all the necessary tools and materials, you’re ready to begin the installation process. Step 2: Plan the Drainage Route The success of your channel drainage system depends on proper planning. Before digging, determine the best route for the drain. Consider the following: Identify low-lying areas where water tends to accumulate. Plan the slope to ensure proper water flow. A gentle downward slope (about 1/8 inch per foot) is ideal. Decide where the water will be discharged—this could be a storm drain, dry well, or a designated drainage area. Check for underground utilities before digging by contacting your local utility service. Once you have your plan in place, use chalk or marking spray to outline the trench path. Step 3: Dig the Trench Using a shovel or trenching tool, start digging along the marked path. The trench should be deep enough to accommodate the channel drain while allowing for a stable base. The width of the trench should be slightly wider than the drain to allow for proper placement and backfilling. For driveways and other high-traffic areas, the trench depth should allow for a concrete base. For other areas like gardens or patios, a gravel or sand base is sufficient. Step 4: Prepare the Base To ensure stability, the base of the trench should be prepared properly. If installing the drain in a concrete area, pour a thin layer of concrete at the bottom. Otherwise, use a layer of compacted sand or gravel to provide a firm foundation. The base should maintain the desired slope to promote efficient water flow. Step 5: Position the Channel Drain Carefully place the channel drain into the trench. Check that it aligns with the planned slope and adjust as needed using a level. If the drain has interlocking sections, connect them securely before placement. Attach end caps to prevent water from leaking out at undesired points. For driveways or high-traffic zones, ensure the drain is flush with the surface to prevent tripping hazards and damage from vehicles. Step 6: Connect to the Drainage System Once the channel drain is in place, connect it to the drainage pipe leading to the designated water outlet. Secure the connection with appropriate fittings, ensuring a watertight seal. If needed, use a flexible coupling to accommodate slight misalignments. Step 7: Secure and Backfill For concrete installations: Mix and pour concrete around the drain edges to hold it in place. Smooth the surface to blend with the surrounding area. Allow the concrete to cure for at least 24 hours before using the area. For non-concrete installations: Backfill around the drain with gravel or compacted soil. Ensure that the drain remains level and secure. Reinstall any removed pavers, turf, or landscaping elements. Step 8: Install the Grate and Final Touches Once the drain is secured, place the grate over it. Ensure it fits snugly and is level with the surrounding surface. If the grate is removable, check periodically for debris buildup to maintain optimal drainage performance. Step 9: Test the Drainage System Before considering the project complete, test the drain by running water through it. Use a garden hose to simulate rainfall and observe how well the water flows through the system. If you notice any pooling or slow drainage, make necessary adjustments by rechecking the slope or connections. Conclusion Installing a channel drain yourself is a manageable DIY project that can significantly improve your outdoor drainage system. By following these simple steps, you can prevent water damage, enhance the functionality of your space, and save money on professional installation costs. With proper planning, careful execution, and regular maintenance, your channel drain will serve you efficiently for years to come. If you’re considering this project, gather your tools and start today—you’ll be glad you took the initiative to enhance your property’s drainage system!

Scroll to Top